Prerequisites to Rooting
Before we get started, you'll need to make sure that your device is compatible with this rooting process. These are the models of the Galaxy Note 2 that will work:
- International (GT-N7100 / GT-N7105)
- AT&T (SGH-I317)
- T-Mobile (SGH-T889)
- Canadian models (starting with SGH-I317 or SGH-T889)
You can find your model number either under the battery or in "About Device" at the bottom of the "Settings" menu. If your device is not listed above, do not use this rooting method. There's a good chance you'll brick it.
You should also make sure to backup all your data before rooting, as there's always a possibility you'll lose it.
Rooting the Galaxy Note 2 (Windows)
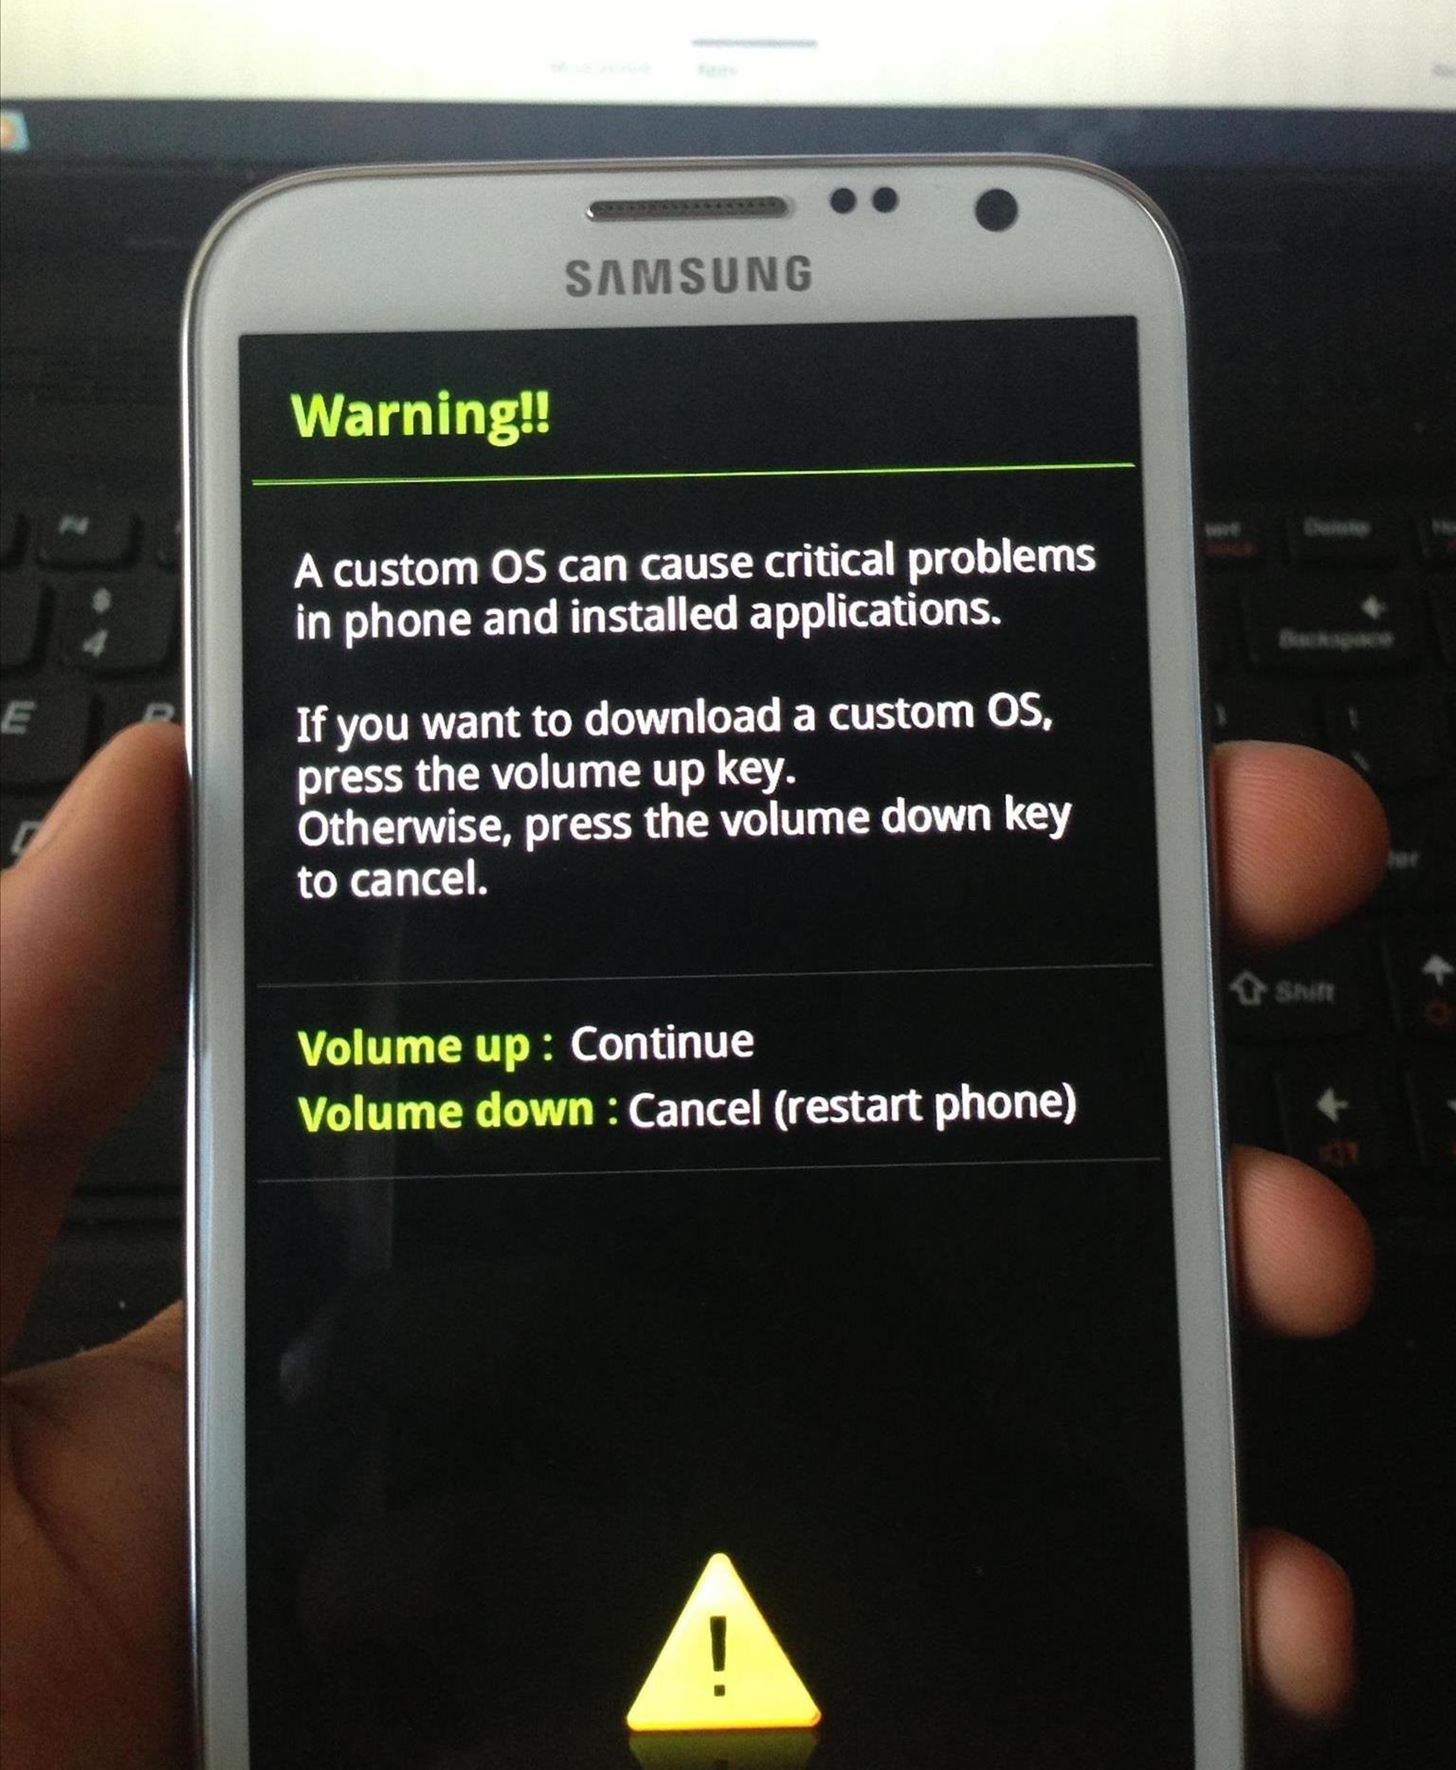
First, you'll need to put your device into download mode. Turn it off, then hold the Volume Down + Home + Power buttons until you see the screen below.
Press the Volume Up button to continue. This will take you to ODIN download mode. Once you see the "Downloading..." screen, connect your Note 2 to your Windows computer via USB cable.
Note: Your device is not actually downloading anything at this point. This just means it has successfully entered download mode.
The next several steps will take place on your computer.
If you don't already have it, download and install the Samsung USB Drivers. Now, download and unzip the GalaxyNote2Root.zip file. Open the ODIN program by double-clicking the odin3 v1.85.exe application file.
In the ODIN program, you should see a yellow ID:COM box with a random number in it. If for some reason you don't see it, make sure your Samsung USB drivers are installed correctly and unplug your Note 2, then plug it back into your computer.
Without changing any other settings, click on PDA under Files [Download] and find the cwm6-root-note2.tar. file. Select it and click on Start. From here, ODIN will flash the custom CWM Recovery. If it's successful, a green "PASS!" box will appear.
When it finishes, your device will boot into ClockworkMod (CWM) Recovery one time in order to install the SuperUser app and its binaries. Then, reboot again.
Once your device finishes rebooting, you should find a new application called called SuperSU.
Your Galaxy Note 2 is now rooted and ready for you to explore. Now, you can customize it with any ROM, kernel or mod you want, and finally have access to all those root-only apps in the Play Store. Be sure to share your favorites with us in the comments below.


No comments:
Post a Comment